
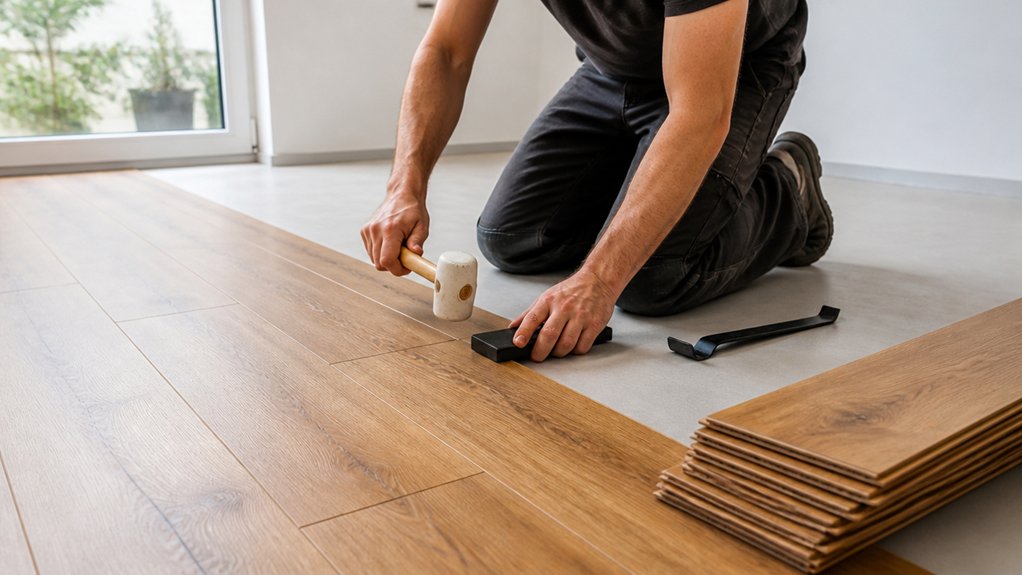
Laying laminate flooring like a pro starts before you install the first plank. You’ll need to prepare and level the subfloor, plan the layout, and let the flooring acclimate to the room. Then you can install the underlayment, fit the planks with proper expansion gaps, and finish with trim. A few careful choices at the start can prevent uneven rows and awkward cuts later—especially at the final edge.
Key Takeaways
- Prepare a clean, dry, level subfloor; repair damage, resolve moisture issues, and gather tools and safety gear.
- Measure the room, plan plank direction and row widths, and acclimate unopened flooring according to manufacturer instructions.
- Install approved underlayment, set expansion-gap spacers, and align the first row carefully before joining planks.
- Lay remaining rows with staggered end joints, tapping joints snugly and checking regularly for gaps or shifting.
- Measure and fit the final row, remove spacers, then install trim and transitions without restricting floor movement.
Prepare the Subfloor and Gather Your Tools

Before opening the flooring boxes, prepare a clean, dry, level subfloor so the laminate locks together properly and stays stable. During your subfloor inspection, remove old adhesive, nails, staples, and debris. Check for loose boards, cracks, moisture, and uneven areas; repair defects and follow the flooring manufacturer’s flatness limits.
Let concrete dry fully, and address moisture problems before installation. Sweep or vacuum thoroughly so grit won’t interfere with the locking joints.
Make tool selection based on your floor type and room conditions. Gather a tape measure, pencil, straightedge, utility knife, tapping block, pull bar, spacers, and a saw suited to cutting laminate.
Wear safety glasses and hearing protection when cutting. Keep a dust mask handy, and use a level to verify the surface. Read the product instructions before work, since specific preparation requirements can vary.
Plan the Layout and Let Planks Acclimate
Once the subfloor is ready, plan the plank direction and starting point, accounting for doorways, room shape, and the final row’s width. Sketch the room, measure its dimensions, and estimate how many planks each row will need. Check the manufacturer’s instructions for acclimation requirements, then keep unopened cartons flat in the room for the recommended period.
- Map obstacles: Mark doorways, alcoves, and fixed features so your plan minimizes awkward cuts.
- Balance the edges: Adjust the layout to avoid a very narrow final row; consider shifting the starting line.
- Preview the finish: Compare Color coordination with nearby surfaces, and arrange planks to distribute Pattern variation naturally.
Keep cartons away from direct sunlight, moisture, and heating vents while they acclimate. A thoughtful plan helps you use materials efficiently and achieve a balanced appearance.
Install Underlayment and the First Row
With the layout set and the planks acclimated, install the underlayment according to the flooring manufacturer’s instructions, keeping seams aligned and avoiding overlaps unless specified.
Choose among underlayment types approved for your laminate; some products have attached padding, while others require a separate layer. Don’t add extra cushioning unless the manufacturer allows it, since excess softness can damage locking joints.
Set spacers along the starting wall to maintain the required expansion gap. Check first row alignment against your layout marks, and confirm the row runs straight with a level or chalk line.
Trim the first plank as planned, then connect the end joints according to the product’s instructions. Keep the tongue or groove oriented as directed, and press each joint fully together.
Recheck the row’s straightness and spacing before proceeding.
Lay the Remaining Laminate Flooring
After the first row is secure and straight, continue laying planks across the room, staggering end joints by the distance the manufacturer recommends. Keep expansion gaps at the walls, and check each row for alignment before moving on. Use a tapping block to snug joints without damaging plank edges.
Cut planks with the finished side facing the correct direction for your saw, and remove dust before joining pieces.
- Start each row: Use the previous row’s offcut when it’s long enough to maintain the required stagger.
- Work steadily: Angle each plank into the long edge, lower it, then lock the end joint according to the flooring instructions.
- Manage the space: Plan Furniture relocation so you can keep a clear work area; don’t reinstall Wall molding yet.
Periodically inspect the floor for gaps, debris, or shifting planks.
Fit the Final Row and Install Trim
When you reach the last row, measure the remaining space at several points, accounting for the required expansion gap at the wall. Transfer the measurements to each plank, then use a straightedge to mark the cutting line. Cut planks to width with the finished side facing the correct direction for your saw, and test-fit them before installation.
Use a pull bar to lock the final row without damaging its edges.
After laying the floor, remove spacers and install baseboards or quarter-round molding to cover the expansion gap. Fasten trim to the wall, not the laminate, so the floor can move freely.
For doorways and adjoining surfaces, choose suitable transition trimming. Complete threshold installation by securing the transition strip according to its instructions, ensuring it covers exposed edges without pinning the floating floor in place.
Leave a Reply